List of Randomizer Checks
Jump to navigation
Jump to search
Checks are locations where items can be found depending on the options selected in the randomizer. The chests currently assume you are playing the Gamecube version of the game, so if you want to use this list for TPWii, you will need to flip the orientation (i.e East=West, Left=Right, etc.). This list is not a definitive logic-based list. It is just to give you an idea of which check is which and where they are located.
Treasure Chests/Event Items
Dungeons
| Check Name | Location | Check Description | Requirements | Image |
|---|---|---|---|---|
| Forest Temple Big Baba Key | Forest Temple | Defeat the Big Baba in the West Wing to reveal the item. | ||
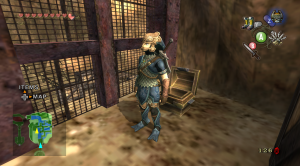
| Forest Temple Big Key Chest | Forest Temple | Use the Boomerang on the pinwheels in the East Wing to open the wooden gates that block the chest. | ||
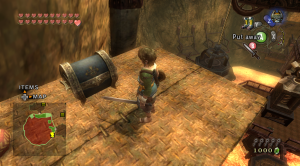
| Forest Temple Central Chest Behind Stairs | Forest Temple | Use the Bombling to destroy the boulder underneath the north door in the Lobby to reveal the chest. Since the chest can blocked by the stairs if you light all of the torches, this check logically requires the Boomerang to blow the torches out. | ||
| Forest Temple Central Chest Hanging From Web | Forest Temple | In the Lobby, destroy the web that is holding the web with either the Ball and Chain, Boomerang, Bow, or Clawshot. | ||
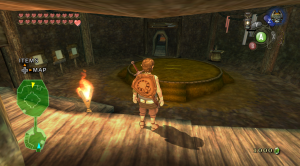
| Forest Temple Central North Chest | Forest Temple | In the Lobby, use the Lantern to light all of the torches to raise the stairs to reach the chest. | ||
| Forest Temple Dungeon Reward | Forest Temple | This item is given to the player by Midna after defeating Diababa. | ||
| Forest Temple East Tile Worm Chest | Forest Temple | In the room to the east of the windless bridge, use the boomerang to defeat the Tile Worms and continue up the vines to reach the ledge adjacent to the chest. | ||
| Forest Temple East Water Cave Chest | Forest Temple | In the East Wing, swim into the cave located to the north of the Big Key chest to find the chest. | ||
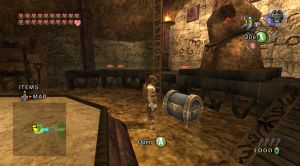
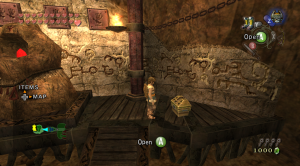
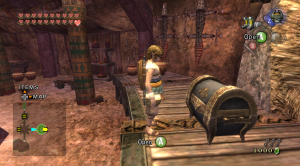
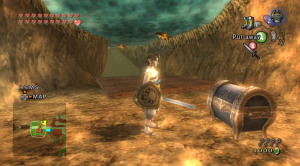
| Forest Temple Entrance Vines Chest | Forest Temple | When you first enter the dungeon, kill the Walltulas on the vines to the right and climb up to the chest. | None | |
| Forest Temple Gale Boomerang | Forest Temple | Defeat Ook to receive the item. | ||
| Forest Temple North Deku Like Chest | Forest Temple | In the room to the west of the room before the dungeon's boss, use the Boomerang to grab a Bombling and throw it into the Deku Like's mouth to reach the chest. | ||
| Forest Temple Second Monkey Under Bridge Chest | Forest Temple | In the room with the Monkey in the cage on the Totem Pole, the chest can be found under the ledge that the player entered the room on. | ||
| Forest Temple Totem Pole Chest | Forest Temple | In the West Tile Worm Room, roll into the Totem Pole to knock down the chest. | ||
| Forest Temple West Deku Like Chest | Forest Temple | In the West Wing, use a Bombling to defeat the Deku Like to access the chest. | ||
| Forest Temple West Tile Worm Chest Behind Stairs | Forest Temple | In the West Tile Worm Room, use the Boomerang to blow out the torches to access the chest. | ||
| Forest Temple West Tile Worm Room Vines Chest | Forest Temple | In the West Tile Worm Room, climb the vines to reach the small chest on the ledge. | ||
| Forest Temple Windless Bridge Chest | Forest Temple | In the Windless Bridge Room, the chest can be found by the southern entrance. | ||
| Goron Mines After Crystal Switch Room Magnet Wall Chest | Goron Mines | In the room with the water and the crystal switch, activate the switch to open the gate and then use the Iron Boots to walk on the wall to reach the chest. | ||
| Goron Mines Beamos Room Chest | Goron Mines | In the circular room with the Beamos, the chest can be found hiding behind one of the Beamos. | Iron Boots, 2 Goron Mines Keys, Any Sword OR Hero Bow | |
| Goron Mines Chest Before Dangoro | Goron Mines | In the room with the rotating magnetic planks, before entering the Midboss room, there is a small chest on the ledge. | ||
| Goron Mines Crystal Switch Room Small Chest | Goron Mines | In the room with the water and the crystal switch, use the Iron Boots to reach the chest that is sitting on the ledge near the crystal switch | ||
| Goron Mines Crystal Switch Room Underwater Chest | Goron Mines | In the room with the water and the crystal switch, use the Iron Boots to open the chest that is underwater. | ||
| Goron Mines Dangoro Chest | Goron Mines | After defeating Dangoro, this is the chest that contains the Bow in Vanilla. | ||
| Goron Mines Dungeon Reward | Goron Mines | This item is given to the player by Midna after defeating Fyrus. | ||
| Goron Mines Entrance Chest | Goron Mines | In the first room of the dungeon, there is a small chest located on top of the cage guarded by a Lava Slug. | ||
| Goron Mines Gor Amato Chest | Goron Mines | In Gor Amato's room, there is a large chest behind him. | ||
| Goron Mines Gor Amato Small Chest | Goron Mines | In Gor Amato's room, there is a small chest behind him. | ||
| Goron Mines Gor Ebizo Chest | Goron Mines | In Gor Ebizo's room, there is a chest behind him. | ||
| Goron Mines Gor Liggs Chest | Goron Mines | In Gor Liggs' room, there is a chest behind him. | ||
| Goron Mines Magnet Maze Chest | Goron Mines | In the room with the upside down magnet maze, there is a chest at the end of one of the paths. | ||
| Goron Mines Main Magnet Room Bottom Chest | Goron Mines | In the large room with the magnets, there is a chest on the lowest level. | ||
| Goron Mines Main Magnet Room Top Chest | Goron Mines | In the large magnet room, there is a chest at the very top of the room that can be reached after defeating the Midboss. | ||
| Goron Mines Outside Beamos Chest | Goron Mines | In the outside area of the dungeon, there is a small chest located near the Beamos | ||
| Goron Mines Outside Clawshot Chest | Goron Mines | In the outside area of the dungeon, use the Clawshot on the hanging ropes on the north side of the room to reach the chest. | ||
| Goron Mines Outside Underwater Chest | Goron Mines | In the outside area of the dungeon, there is a chest underwater that can be accessed by destroying the wooden gate in front of it. | ||
| Lakebed Temple Before Deku Toad Alcove Chest | Lakebed Temple | In the room before the Midboss room, there is a chest outside the door that leads to the room. | ||
| Lakebed Temple Before Deku Toad Underwater Left Chest | Lakebed Temple | In the room before the Midboss room, use the Iron Boots to reach the chest. | ||
| Lakebed Temple Before Deku Toad Underwater Right Chest | Lakebed Temple | In the room before the Midboss room, use the Iron Boots to reach the chest. | ||
| Lakebed Temple Big Key Chest | Lakebed Temple | In the room above the chest, use the Clawshot to hang from the target and lower down to the chest. | ||
| Lakebed Temple Central Room Chest | Lakebed Temple | In the central hub of the dungeon, there is a big chest on one of the levels. | ||
| Lakebed Temple Central Room Small Chest | Lakebed Temple | In the central hub of the dungeon, there is a small chest on one of the levels. | ||
| Lakebed Temple Central Room Spire Chest | Lakebed Temple | In the central hub of the dungeon, after raising the water level once, you can swim to the chest. | ||
| Lakebed Temple Chandelier Chest | Lakebed Temple | In the central hub of the dungeon, use the Clawshot to reach the chandelier that hides the chest. | ||
| Lakebed Temple Deku Toad Chest | Lakebed Temple | Defeat the Deku Toad midboss to reveal the chest. | ||
| Lakebed Temple Dungeon Reward | Lakebed Temple | Given by Midna after defeating Morpheel. | ||
| Lakebed Temple East Lower Waterwheel Bridge Chest | Lakebed Temple | After opening the West Waterway, go back to the lower east wing with the water raised to cross the bridge and use the Clawshot to reach the chest. | ||
| Lakebed Temple East Lower Waterwheel Stalactite Chest | Lakebed Temple | On the lower level of the East Wing, destroy the hanging stalactite to get access to the chest. | ||
| Lakebed Temple East Second Floor Southeast Chest | Lakebed Temple | On the upper level of the East Wing, you can find the chest in the southeast corner of the room. | ||
| Lakebed Temple East Second Floor Southwest Chest | Lakebed Temple | On the upper level of the East Wing, you can find the chest in the southwest corner of the room. | ||
| Lakebed Temple East Water Supply Clawshot Chest | Lakebed Temple | In the East Water Supply, use the Clawshot on the targets at the top to reach the chest. | ||
| Lakebed Temple East Water Supply Small Chest | Lakebed Temple | In the East Water Supply, there is a small chest at the very top. | ||
| Lakebed Temple Lobby Left Chest | Lakebed Temple | In the Lobby after swimming through the path, you can find the chest in teh lobby. | ||
| Lakebed Temple Lobby Rear Chest | Lakebed Temple | In the Lobby after swimming through the path, you can find the chest in teh lobby. | ||
| Lakebed Temple Stalactite Room Chest | Lakebed Temple | In the room to the north of the Lobby, destroy the hanging stalactites to reach the chest. | ||
| Lakebed Temple Underwater Maze Small Chest | Lakebed Temple | Make your way through the underwater maze to find the small chest. | ||
| Lakebed Temple West Lower Small Chest | Lakebed Temple | In the lower floor of the West Wing, use the Clawshot to reach the chest. | ||
| Lakebed Temple West Second Floor Central Small Chest | Lakebed Temple | In the upper floor of the West Wing, use the Clawshot to reach the chest. | ||
| Lakebed Temple West Second Floor Northeast Chest | Lakebed Temple | In the upper floor of the West Wing the chest is located in the northeast corner of the room. | ||
| Lakebed Temple West Second Floor Southeast Chest | Lakebed Temple | In the upper floor of the West Wing the chest is located in the southeast corner of the room. | ||
| Lakebed Temple West Second Floor Southwest Underwater Chest | Lakebed Temple | In the upper floor of the West Wing use the Iron Boots to open the underwater chest. | ||
| Lakebed Temple West Water Supply Chest | Lakebed Temple | In the West Water Supply, there is a chest at the top. | ||
| Lakebed Temple West Water Supply Small Chest | Lakebed Temple | In the West Water Supply, use the Clawshot on the targets at the top to reach the chest. | ||
| Arbiters Grounds Big Key Chest | Arbiters Grounds | Navigate your way around the dungeon through the various corridors after the Poe Gate to reach the chest. | ||
| Arbiters Grounds Death Sword Chest | Arbiters Grounds | Defeat the Death Sword Midboss to unlock the door to the chest. | ||
| Arbiters Grounds Dungeon Reward | Arbiters Grounds | Given to the player by Midna once Stallord has been defeated. | ||
| Arbiters Grounds East Lower Turnable Redead Chest | Arbiters Grounds | In the turnable room on the first floor, rotate the room and defeat the Redead that is guarding the chest. | ||
| Arbiters Grounds East Upper Turnable Chest | Arbiters Grounds | In the turnable room on the second floor, break the wooden gate to get access to the chest. | ||
| Arbiters Grounds East Upper Turnable Redead Chest | Arbiters Grounds | In the turnable room on the second floor, rotate the room and defeat the Redead that is guarding the chest. | ||
| Arbiters Grounds Entrance Chest | Arbiters Grounds | In the Entrance room, pull the chain to open the gate and then break the wooden gate to reach the chest. | ||
| Arbiters Grounds Ghoul Rat Room Chest | Arbiters Grounds | In the room after the 3rd Poe, you can reach the chest by walking into the room. | ||
| Arbiters Grounds North Turning Room Chest | Arbiters Grounds | In the Northern Wing, use the turntable to raise and lower the platform to reach the chest. | ||
| Arbiters Grounds Spinner Room First Small Chest | Arbiters Grounds | In the room with the Spinner rails, there is a small chest on a ledge in the front of the room. | ||
| Arbiters Grounds Spinner Room Lower Central Small Chest | Arbiters Grounds | In the room with the Spinner rails, there is a small chest on a ledge in the rear of the room. | ||
| Arbiters Grounds Spinner Room Lower North Chest | Arbiters Grounds | In the room with the Spinner rails, there is a small below the rails that lead out of the room. | ||
| Arbiters Grounds Spinner Room Second Small Chest | Arbiters Grounds | In the room with the Spinner rails, there is a small chest on a ledge in the middle of the room.. | ||
| Arbiters Grounds Spinner Room Stalfos Alcove Chest | Arbiters Grounds | In the room with the Spinner rails, there is a chest in an alcove filled with Stalfos that can be reached by using one of the Spinner rails.. | ||
| Arbiters Grounds Torch Room East Chest | Arbiters Grounds | In the room with the Poe torches, the chest can be found to the right of the stairs. | ||
| Arbiters Grounds Torch Room West Chest | Arbiters Grounds | In the room with the Poe torches, the chest can be found to the left of the stairs. | ||
| Arbiters Grounds West Chandelier Chest | Arbiters Grounds | After making your way through the East Wing and moving the block on the West Wing, pull the chain to lift up the chandelier to access the chest. | ||
| Arbiters Grounds West Small Chest Behind Block | Arbiters Grounds | In the West Wing, the chest can be accessed by following the path on the right from the door. | ||
| Arbiters Grounds West Stalfos Northeast Chest | Arbiters Grounds | In the West Wing Stalfos Room, destroy the wooden gate to access the chest. | ||
| Arbiters Grounds West Stalfos West Chest | Arbiters Grounds | In the West Wing Stalfos Room, destroy the wooden gate to access the chest. | ||
| Snowpeak Ruins Ball and Chain | Snowpeak Ruins | After defeating the Darkhammer Midboss, the item can be picked up off the ground. | ||
| Snowpeak Ruins Broken Floor Chest | Snowpeak Ruins | In the caged Freezard room, use the Bombs or Ball and Chain to destroy the cracked floor to reach the chest. | ||
| Snowpeak Ruins Chapel Chest | Snowpeak Ruins | In the Chapel, defeat all of the Chilfos to unlock the door to the chest. | ||
| Snowpeak Ruins Chest After Darkhammer | Snowpeak Ruins | After defeating the Darkhammer Midboss, use the Ball and Chain on the ice in the north room to reveal the chest. | ||
| Snowpeak Ruins Courtyard Central Chest | Snowpeak Ruins | In the Courtyard, either use the cannon or the Ball and Chain to destroy the ice that is blocking the chest. | ||
| Snowpeak Ruins Dungeon Reward | Snowpeak Ruins | This item is given by Midna once Blizzeta is defeated. | ||
| Snowpeak Ruins East Courtyard Buried Chest | Snowpeak Ruins | In the Eastern Courtyard, use the Wolf to uncover the chest. | ||
| Snowpeak Ruins East Courtyard Chest | Snowpeak Ruins | In the Eastern Courtyard the chest is out in the open. | ||
| Snowpeak Ruins Lobby Chandelier Chest | Snowpeak Ruins | In the Lobby, use the Ball and Chain to move the chandeliers to reach the chest. | ||
| Snowpeak Ruins Lobby East Armor Chest | Snowpeak Ruins | In the Lobby, use the Ball and Chain to destroy the suits of armor to reveal the chest. | ||
| Snowpeak Ruins Lobby West Armor Chest | Snowpeak Ruins | In the Lobby, use the Ball and Chain to destroy the suits or armor to reveal the chest. | ||
| Snowpeak Ruins Northeast Chandelier Chest | Snowpeak Ruins | In the upper level of the northeastern-most room, use the Ball and Chain to move the chandelier to reach the chest. | ||
| Snowpeak Ruins Ordon Pumpkin Chest | Snowpeak Ruins | In the lower level of the northeastern-most room, defeat the Chilfos in the room to unlock the door to the chest. | ||
| Snowpeak Ruins West Cannon Room Central Chest | Snowpeak Ruins | In the frozen cannon room, use the Ball and Chain to destroy the ice that is blocking the chest. | ||
| Snowpeak Ruins West Cannon Room Corner Chest | Snowpeak Ruins | In the frozen cannon room, use the cannon or the Ball and Chain to destroy the ice that is blocking the chest. | ||
| Snowpeak Ruins West Courtyard Buried Chest | Snowpeak Ruins | In the West Courtyard, use the Wolf to uncover the chest in the snow. | ||
| Snowpeak Ruins Wooden Beam Central Chest | Snowpeak Ruins | In the wooden beam room. Jump across the beams to reach the chest in the center of the room. | ||
| Snowpeak Ruins Wooden Beam Chandelier Chest | Snowpeak Ruins | In the upper level of the wooden beam room, use the Ball and Chain to move the chandelier and reach the stream. | ||
| Snowpeak Ruins Wooden Beam Northwest Chest | Snowpeak Ruins | In the wooden beam room, Jump across the beams to reach the chest that is in the corner. | ||
| Temple of Time Armos Antechamber East Chest | Temple of Time | In the room with the two Armos, defeat the Armos to reveal the chest. | ||
| Temple of Time Armos Antechamber North Chest | Temple of Time | In the room with the two Armos, you can walk to the chest at the top of the stairs. | ||
| Temple of Time Armos Antechamber Statue Chest | Temple of Time | In the room with the two Armos, use the Dominion Rod to move the statues onto the two buttons to reveal the chest. | ||
| Temple of Time Big Key Chest | Temple of Time | Use the statues and Helmasaur armor to press the switches to open the door to the chest. | ||
| Temple of Time Chest Before Darknut | Temple of Time | Defeat the enemies in the room to reveal the chest. | ||
| Temple of Time Darknut Chest | Temple of Time | Defeat the Darknut midboss to reveal the chest. | ||
| Temple of Time Dungeon Reward | Temple of Time | This item is given by Midna once Armogohma is defeated. | ||
| Temple of Time First Staircase Armos Chest | Temple of Time | While climbing the first staircase, defeat the Armos to reveal the chest. | ||
| Temple of Time First Staircase Gohma Gate Chest | Temple of Time | While climbing the first staircase, there is a chest in the first room with the Gohma | ||
| Temple of Time First Staircase Window Chest | Temple of Time | While climbing the first staircase, in the room with the Armos, there is a small chest sitting in a window. | ||
| Temple of Time Floor Switch Puzzle Room Upper Chest | Temple of Time | In the room with the Big Key chest, use the Clawshot to reach the chest on the upper ledge. | ||
| Temple of Time Guillotine Chest | Temple of Time | In the room with the swinging Guillotine, there is a chest behind it. | ||
| Temple of Time Lobby Lantern Chest | Temple of Time | In the Lobby of the dungeon, use the Lantern on the torches to reveal the chest. | ||
| Temple of Time Moving Wall Beamos Room Chest | Temple of Time | In the room with the moving walls, use the Bow to move the walls to reach the chest. | ||
| Temple of Time Moving Wall Dinalfos Room Chest | Temple of Time | In the room with the moving walls, use the Dominion Rod to move a statue onto the switch to disable the electrical barrier that blocks access to the chest. | ||
| Temple of Time Scales Gohma Chest | Temple of Time | In the room with the scales, defeat all of the enemies to reveal the chest. | ||
| Temple of Time Scales Upper Chest | Temple of Time | In the room with the scales, use the Clawshot to reach the central platform and then use the Spinner to reach the chest. | ||
| City in The Sky Aeralfos Chest | City in The Sky | Defeat the Aeralfos Midboss to unlock access to this chest. | ||
| City in The Sky Baba Tower Alcove Chest | City in The Sky | In the Big Baba room, this chest can be found under the ledge that leads to the next room. | ||
| City in The Sky Baba Tower Narrow Ledge Chest | City in The Sky | In the Big Baba room, there is a small chest along a narrow ledge that is guarded by some Keese. | ||
| City in The Sky Baba Tower Top Small Chest | City in The Sky | In the Big Baba room, there is a small chest on the highest ledge in the room. | ||
| City in The Sky Big Key Chest | City in The Sky | Once you reach the outside room above the central fan, use the Wolf to walk across the ropes to reach the chest in the center room. | ||
| City in The Sky Central Outside Ledge Chest | City in The Sky | Once you reach the outside room above the central fan, use the Wolf to walk across the ropes then defeat the Walltulas to reach the chest. | ||
| City in The Sky Central Outside Poe Island Chest | City in The Sky | Once you reach the outside room above the central fan, use the Wolf to walk across the ropes to reach the ledge with the Poe on it. | ||
| City in The Sky Chest Behind North Fan | City in The Sky | After activating the north fan, use the Double Clawshot to reach the other side of the North Wing to find the chest behind the northern fan blades. If you accidently activate the fan, you can save warp to reset it. | ||
| City in The Sky Chest Below Big Key Chest | City in The Sky | Once you reach the outside room above the central fan, go through the door on the ground level to reach the chest. | ||
| City in The Sky Dungeon Reward | City in The Sky | The item is given to you by Midna after you defeat Argorok. | ||
| City in The Sky East First Wing Chest After Fans | City in The Sky | After crossing the East Wing first room, you can find the chest through a door in an enclosed room. | ||
| City in The Sky East Tile Worm Small Chest | City in The Sky | In the East Wing room with the Tile Worms, there is a small chest on a ledge. | ||
| City in The Sky East Wing After Dinalfos Alcove Chest | City in The Sky | In the upper room of the East Wing with the Occa, use the Clawshot to pull the switch and open the ledge, then use an Occa to fly to the alcove that opened up. | ||
| City in The Sky East Wing After Dinalfos Ledge Chest | City in The Sky | In the upper room of the East Wing with the Occa, use an Occa to fly to the ledge with the chest. | ||
| City in The Sky East Wing Lower Level Chest | City in The Sky | In the first room of the East Wing, use the Double Clawshot to reach the lower chest. | ||
| City in The Sky Underwater East Chest | City in The Sky | In the Entrance room of the dungeon, use the Iron Boots to open the chest. | ||
| City in The Sky Underwater West Chest | City in The Sky | In the Entrance room of the dungeon, use the Iron Boots to open the chest. | ||
| City in The Sky West Garden Corner Chest | City in The Sky | In the West Wing upper open area, there is a chest in the corner of one of the Peahat areas. | ||
| City in The Sky West Garden Ledge Chest | City in The Sky | In the West Wing upper open area, there use the Double Clawshot on the Peahats to loop around and reach the chest. | ||
| City in The Sky West Garden Lone Island Chest | City in The Sky | In the West Wing upper open area, use the Double Clawshot to reach the lone island with a Poe to reach the chest. | ||
| City in The Sky West Garden Lower Chest | City in The Sky | In the West Wing upper open area, there is a small chest under the ledge of the northern door. | ||
| City in The Sky West Wing Baba Balcony Chest | City in The Sky | In the West Wing, use the Double Clawshot to navigate the maze to find the chest on a ledge with a couple Baba Serpents. | ||
| City in The Sky West Wing First Chest | City in The Sky | In the West Wing, you can jump over to the chest in the first part of the room. | ||
| City in The Sky West Wing Narrow Ledge Chest | City in The Sky | In the West Wing near the door to the Big Baba room, there is a small chest on the narrow ledge. | ||
| City in The Sky West Wing Tile Worm Chest | City in The Sky | In the West Wing near the door to the Big Baba room, there is a chest on a ledge guarded by a Tile Worm. | ||
| Palace of Twilight Big Key Chest | Palace of Twilight | Use the Light Sword to get behind the wall of darkness and then use the Double Clawshot to reach the chest. | ||
| Palace of Twilight Central First Room Chest | Palace of Twilight | Defeat all of the Zant Heads to reveal the chest. | ||
| Palace of Twilight Central Outdoor Chest | Palace of Twilight | Deafeat all of the Zant Heads to reveal the chest. | ||
| Palace of Twilight Central Tower Chest | Palace of Twilight | Defeat both Zant Heads to reveal the chest at the top of the tower. | ||
| Palace of Twilight Collect Both Sols | Palace of Twilight | Bring both Sols to the entrance to receive the item. | ||
| Palace of Twilight East Wing First Room East Alcove | Palace of Twilight | Use the Sol or the Light Sword to activate the platform that leads to the chest. | ||
| Palace of Twilight East Wing First Room North Small Chest | Palace of Twilight | Use the Clawshot to reach the platforms that lead to the chest. | ||
| Palace of Twilight East Wing First Room West Alcove | Palace of Twilight | Use the Sol or the Light Sword to activate the platform that leads to the chest. | ||
| Palace of Twilight East Wing First Room Zant Head Chest | Palace of Twilight | Defeat the Zant Head to reveal the chest. | ||
| Palace of Twilight East Wing Second Room Northeast Chest | Palace of Twilight | Defeat the Shadow Beasts in the room and then use the Double Clawshot to reach the chest. | ||
| Palace of Twilight East Wing Second Room Northwest Chest | Palace of Twilight | Defeat the Shadow Beasts in the room and then use the Double Clawshot to reach the chest. | ||
| Palace of Twilight East Wing Second Room Southeast Chest | Palace of Twilight | Defeat the Shadow Beasts in the room and then use the Double Clawshot to reach the chest. | ||
| Palace of Twilight East Wing Second Room Southwest Chest | Palace of Twilight | Defeat the Shadow Beasts in the room and then use the Double Clawshot to reach the chest. | ||
| Palace of Twilight West Wing Chest Behind Wall of Darkness | Palace of Twilight | Either use the Sol or the Light Sword to dispel the darkness and use the Clawshot to reach the chest. | ||
| Palace of Twilight West Wing First Room Central Chest | Palace of Twilight | Defeat the Zant Head in this room to reveal the chest. | ||
| Palace of Twilight West Wing Second Room Central Chest | Palace of Twilight | Defeat the Zant Head in this room to reveal the chest. | ||
| Palace of Twilight West Wing Second Room Lower South Chest | Palace of Twilight | Defeat the Zant Head in this room to reveal the chest. | ||
| Palace of Twilight West Wing Second Room Southeast Chest | Palace of Twilight | Use the Double Clawshot to reach the chest on the upper ledge. | ||
| Hyrule Castle Big Key Chest | Hyrule Castle | On the second floor southeastern balcony, watch the cutscene where Link reunites with the Resistance to open the door to the chest. | ||
| Hyrule Castle East Wing Balcony Chest | Hyrule Castle | After completing the Boomerang puzzle on the East Wing, climb the ladder and follow the balcony to find a small chest. | ||
| Hyrule Castle East Wing Boomerang Puzzle Chest | Hyrule Castle | In the East Wing, complete the Boomerang puzzle to open the way to the chest. Hint: the leaves in front of the door show the way. | ||
| Hyrule Castle Graveyard Grave Switch Room Back Left Chest | Hyrule Castle | Once you enter the Graveyard, blow up the boulder in front of the grave guarded by the spirits to open the door to the chest. | ||
| Hyrule Castle Graveyard Grave Switch Room Front Left Chest | Hyrule Castle | Once you enter the Graveyard, blow up the boulder in front of the grave guarded by the spirits to open the door to the chest. | ||
| Hyrule Castle Graveyard Grave Switch Room Right Chest | Hyrule Castle | Once you enter the Graveyard, blow up the boulder in front of the grave guarded by the spirits to open the door to the chest. | ||
| Hyrule Castle Graveyard Owl Statue Chest | Hyrule Castle | Once you enter the Graveyard, blow up the boulder in front of the grave guarded by the spirits to open the door. Then use the lantern to light the torch to stop the rain. Once the rain is stopped, run over to the gate with the two torches in front of it and light them before it starts raining again. Once the gate is opened, use the Powered Dominion Rod to move the Owl Statues into their places to create a bridge that leads to the chest. | ||
| Hyrule Castle Lantern Staircase Chest | Hyrule Castle | In the room with the staircase that can be raised and lowered with torches, defeat the Darknut and then raise the stairs to reach the chest | ||
| Hyrule Castle Main Hall Northeast Chest | Hyrule Castle | After defeating all of the enemies in the room, Clawshot the chandelier to reach the chest. | ||
| Hyrule Castle Main Hall Northwest Chest | Hyrule Castle | After going through the west hallway and defeating both Darknuts, press the switch to lower the chandelier to reach the chest. | ||
| Hyrule Castle Main Hall Southwest Chest | Hyrule Castle | After going through the west hallway and defeating both Darknuts, enter the Main Hall to find the chest. | ||
| Hyrule Castle Southeast Balcony Tower Chest | Hyrule Castle | After defeating the Aeralfos, the door to the chest will open. | ||
| Hyrule Castle Treasure Room Eighth Small Chest | Hyrule Castle | In the Treasure Room next to the boss room, there are a bunch of chests. | ||
| Hyrule Castle Treasure Room Fifth Chest | Hyrule Castle | In the Treasure Room next to the boss room, there are a bunch of chests. | ||
| Hyrule Castle Treasure Room Fifth Small Chest | Hyrule Castle | In the Treasure Room next to the boss room, there are a bunch of chests. | ||
| Hyrule Castle Treasure Room First Chest | Hyrule Castle | In the Treasure Room next to the boss room, there are a bunch of chests. | ||
| Hyrule Castle Treasure Room First Small Chest | Hyrule Castle | In the Treasure Room next to the boss room, there are a bunch of chests. | ||
| Hyrule Castle Treasure Room Fourth Chest | Hyrule Castle | In the Treasure Room next to the boss room, there are a bunch of chests. | ||
| Hyrule Castle Treasure Room Fourth Small Chest | Hyrule Castle | In the Treasure Room next to the boss room, there are a bunch of chests. | ||
| Hyrule Castle Treasure Room Second Chest | Hyrule Castle | In the Treasure Room next to the boss room, there are a bunch of chests. | ||
| Hyrule Castle Treasure Room Second Small Chest | Hyrule Castle | In the Treasure Room next to the boss room, there are a bunch of chests. | ||
| Hyrule Castle Treasure Room Seventh Small Chest | Hyrule Castle | In the Treasure Room next to the boss room, there are a bunch of chests. | ||
| Hyrule Castle Treasure Room Sixth Small Chest | Hyrule Castle | In the Treasure Room next to the boss room, there are a bunch of chests. | ||
| Hyrule Castle Treasure Room Third Chest | Hyrule Castle | In the Treasure Room next to the boss room, there are a bunch of chests. | ||
| Hyrule Castle Treasure Room Third Small Chest | Hyrule Castle | In the Treasure Room next to the boss room, there are a bunch of chests. | ||
| Hyrule Castle West Courtyard Central Small Chest | Hyrule Castle | South of the area where you fight King Bulblin, climb the stairs to the central area to find the small chest on a ledge. | ||
| Hyrule Castle West Courtyard North Small Chest | Hyrule Castle | North of the area where you fight King Bulblin, there is a small chest in what looks like a little shack. |
Free-Standing Items
| Check Name | Location | Check Description | Requirements | Image |
|---|---|---|---|---|
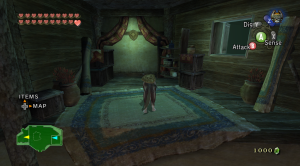
| Ordon Shield | Ordon Village | Hanging on the wall in Jaggle and Pergie's house, you can knock it down as a wolf before Faron Twilight. | ||
| Ordon Sword | Ordon Village | Sitting on the couch in Rusl and Uli's house, you can collect it as a wolf before Faron Twilight. | ||
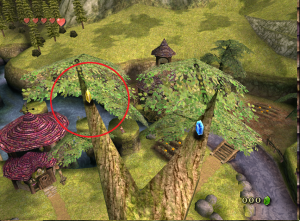
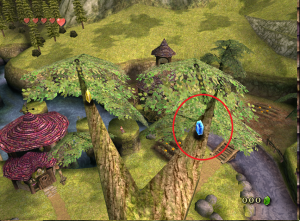
| Faron Field Tree Heart Piece | Hyrule Field - Faron Field | It can be found sitting in a tree near the bridge in the center of the field. | ||
| Cats Hide and Seek Minigame | Hidden Village | After showing the charm to Ilia, return to the Hidden Village as a wolf and talk to the Cucco Leader to start the minigame. | ||
| Kakariko Gorge Spire Heart Piece | Hyrule Field - Kakariko Gorge | On top of the rock spire that is to the north of the bridge. | ||
| Kakariko Village Bomb Rock Spire Heart Piece | Kakariko Village | Near the southern entrance to Kakariko Village, use bomb arrows to blow up the rocks to reveal the item. | ||
| Fishing Hole Heart Piece | Fishing Hole | On the cliff in the middle of the pond. You can rent a boat and catch it with the fishing rod or you can use the clawshot to grab it while swimming. | ||
| Bulblin Camp Roasted Boar | Bulblin Camp | In the back of the camp, destroy the roasted boar to reveal the item. | ||
| Bulblin Guard Key | Bulblin Camp | In the back of the camp. A freestanding item has been placed at behind the Bulblin that normally drops the key. | ||
| Forest Temple Diababa Heart Container | Forest Temple | Dropped by the boss once it is defeated. | ||
| Goron Mines Fyrus Heart Container | Goron Mines | Dropped by the boss once it is defeated. | ||
| Lakebed Temple Morpheel Heart Container | Lakebed Temple | Dropped by the boss once it is defeated. | ||
| Arbiters Grounds Stallord Heart Container | Arbiters Grounds | Dropped by the boss once it is defeated. | ||
| Snowpeak Ruins Blizzeta Heart Container | Snowpeak Ruins | Dropped by the boss once it is defeated. | ||
| Temple of Time Armogohma Heart Container | Temple of Time | Dropped by the boss once it is defeated. | ||
| City in The Sky Argorok Heart Container | City in the Sky | Dropped by the boss once it is defeated. | ||
| Palace of Twilight Zant Heart Container | Palace of Twilight | Dropped by the boss once it is defeated. |
Items from NPCs
| Check Name | Location | Check Description | Requirements | Image |
|---|---|---|---|---|
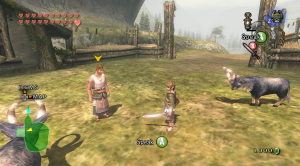
| Herding Goats Reward | Ordon Ranch | Complete the Goat Herding Minigame in under 2 Minutes to get the reward from Fado | None | |
| Ordon Cat Rescue | Ordon Village | During the prologue, use the Fishing Rod to catch two fish for the cat. | ||
| Uli Cradle Delivery | Ordon Village | During the prologue, retrieve Uli's Cradle from the monkey using the hawk. | None | |
| Wrestling With Bo | Ordon Village | Defeat Bo twice in the Sumo Wrestling minigame to make the chest appear. | ||
| Coro Bottle | South Faron Woods | Can be bought from Coro for 100 Rupees. | None | |
| Coro Lantern | South Faron Woods | Given by Coro after talking to him for the first time. | None | |
| Coro Gate Key | South Faron Woods | Given by Coro after talking to him for the first time. | None | |
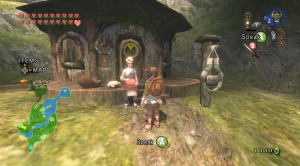
| Barnes Bomb Bag | Kakariko Village | Can be bought from Barnes for 120 Rupees | None | |
| Shad Dominion Rod | Kakariko Village | Given after showing the Skybook to Shad | Skybook | |
| Gift From Ralis | Kakariko Graveyard | After receiving the Zora Armor check from Rutella, you can show Ashei's Sketch to Ralis to get the item. | ||
| Goron Springwater Rush | Hyrule Field - Eldin Field | After donating 1,000 Rupees to Malo Mart to repair the bridge, talk to Gor Liggs to start the minigame and throw the barrel of springwater on the tired goron before it cools. | ||
| Ilia Charm | Hidden Village | Defeat the Bulblins that are attacking the Hidden Village to receive the item from Impaz. | ||
| Ilia Memory Reward | Kakariko Village | Show Ilia the charm to receive the item. | ||
| Renados Letter | Kakariko Village | After completing Temple of Time, talk to Renado in his sanctuary to receive the item. | ||
| Rutelas Blessing | Kakariko Graveyard | Once you have collected the Gate Keys, follow Rutella through the graveyard to receive the item. | ||
| Skybook From Impaz | Hidden Village | Defeat the Bulblins that are attacking the Hidden Village to receive the item from Impaz. | ||
| Talo Sharpshooting | Kakariko Village | After completing Goron Mines, climb to the top of the watchtower in Kakariko Village and talk to Talo to start the minigame, then shoot the 3 targets with the Bow. | ||
| Agitha Female Ant Reward | Castle Town | Show the Female Ant to Agitha. | ||
| Agitha Female Beetle Reward | Castle Town | Show the Female Beetle to Agitha. | ||
| Agitha Female Butterfly Reward | Castle Town | Show the Female Butterfly to Agitha. | ||
| Agitha Female Dayfly Reward | Castle Town | Show the Female Dayfly to Agitha. | ||
| Agitha Female Dragonfly Reward | Castle Town | Show the Female Dragonfly to Agitha. | ||
| Agitha Female Grasshopper Reward | Castle Town | Show the Female Grasshopper to Agitha. | ||
| Agitha Female Ladybug Reward | Castle Town | Show the Female Ladybug to Agitha. | ||
| Agitha Female Mantis Reward | Castle Town | Show the Female Mantis to Agitha. | ||
| Agitha Female Phasmid Reward | Castle Town | Show the Female Phasmid to Agitha. | ||
| Agitha Female Pill Bug Reward | Castle Town | Show the Female Pill Bug to Agitha. | ||
| Agitha Female Snail Reward | Castle Town | Show the Female Snail to Agitha. | ||
| Agitha Female Stag Beetle Reward | Castle Town | Show the Female Stag Beetle to Agitha. | ||
| Agitha Male Ant Reward | Castle Town | Show the Male Ant to Agitha. | ||
| Agitha Male Beetle Reward | Castle Town | Show the Male Beetle to Agitha. | ||
| Agitha Male Butterfly Reward | Castle Town | Show the Male Butterfly to Agitha. | ||
| Agitha Male Dayfly Reward | Castle Town | Show the Male Dayfly to Agitha. | ||
| Agitha Male Dragonfly Reward | Castle Town | Show the Male Dragonfly to Agitha. | ||
| Agitha Male Grasshopper Reward | Castle Town | Show the Male Grasshopper to Agitha. | ||
| Agitha Male Ladybug Reward | Castle Town | Show the Male Ladybug to Agitha. | ||
| Agitha Male Mantis Reward | Castle Town | Show the Male Mantis to Agitha. | ||
| Agitha Male Phasmid Reward | Castle Town | Show the Male Phasmid to to Agitha. | ||
| Agitha Male Pill Bug Reward | Castle Town | Show the Male Pill Bug to Agitha. | ||
| Agitha Male Snail Reward | Castle Town | Show the Male Snail to Agitha. | ||
| Agitha Male Stag Beetle Reward | Castle Town | Show the Male Stag Beetle to Agitha. | ||
| Auru Gift To Fyer | Lake Hylia | After clearing Lanayru Twilight, talk to Auru, who is on top of the tower at the lake to receive the item. | ||
| Charlo Donation Blessing | Castle Town | Donate 500 Rupees to Charlo | ||
| Iza Helping Hand | Upper Zoras River | After unlocking the Upper Zoras River Portal, use the Bomb Arrows to blow up the rocks blocking the river and ride the canoe down the river to receive the item. | ||
| Iza Raging Rapids Minigame | Upper Zoras River | Score 25 points or more in the canoe minigame to receive the item. | ||
| Jovani 20 Poe Soul Reward | Castle Town | Talk to Jovani after collecting 20 Poe Souls to receive the item. | ||
| Jovani 60 Poe Soul Reward | Castle Town | Talk to Jovani after collecting 60 Poe Souls to receive the item. | ||
| Plumm Fruit Balloon Minigame | Upper Zoras River | Score at least 10,000 points in the minigame. | ||
| STAR Prize 1 | Castle Town | Collect all of the stars in the time allotted. | ||
| STAR Prize 2 | Castle Town | After collecting the Double Clawshots and completing the STAR Minigame once, re-visit the STAR Tent and complete the challenge a second time to receive the item. | ||
| Telma Invoice | Castle Town | Show Renado's Letter to Telma to receive the item. | ||
| Zoras Domain Underwater Goron | Zoras Domain | In the main pool of the throne room, use a Water Bomb to destroy the meteor to reveal a Goron trapped inside. Talk to him while wearing the Iron Boots to receive the item. | ||
| Ashei Sketch | Snowpeak | After entering Snowpeak from Zoras Domain, talk to Ashei to receive the item. | ||
| Snowboard Racing Prize | Snowpeak | Once you complete Snowpeak Ruins, you must defeat both Yeto and Yeta to receive the item. | ||
| Cave of Ordeals Great Fairy Reward | Cave of Ordeals | Talk to the Great Fairy on Floor 50 of the Cave of Ordeals to receive the item. | ||
| Goron Mines Gor Amato Key Shard | Goron Mines | Talk to Gor Amato in his chamber in Goron Mines to receive the item. | ||
| Goron Mines Gor Ebizo Key Shard | Goron Mines | Talk to Gor Ebizo in his chamber in Goron Mines to receive the item. | ||
| Goron Mines Gor Liggs Key Shard | Goron Mines | Talk to Gor Liggs in his chamber in Goron Mines to receive the item. | ||
| Snowpeak Ruins Mansion Map | Snowpeak Ruins | Talk to Yeta in the hearth room of Snowpeak Ruins to receive the item. | ||
| Hyrule Castle King Bulblin Key | Hyrule Castle | Defeat King Bulblin in the West Courtyard to receive the item. |
Golden Bugs
| Check Name | Location | Check Description | Requirements | Image |
|---|---|---|---|---|
| Faron Field Female Beetle | Hyrule Field - Faron Field | On a tree that is on a ledge on the northeast part of the field. | ||
| Faron Field Male Beetle | Hyrule Field - Faron Field | On a tree in the center of the field. | ||
| Sacred Grove Female Snail | Sacred Grove - Past | After going through the doors to the past, it can be found on the ride side of the stairs. | ||
| Sacred Grove Male Snail | Sacred Grove - Master Sword Area | In the alcove leading to the upper area, it can be found in a corner above the doorway. | ||
| Bridge of Eldin Female Phasmid | Hyrule Field - Eldin Field | It can be found on the wall above the ledge that leads to the Goron Stockcave. | ||
| Bridge of Eldin Male Phasmid | Hyrule Field - Eldin Field | It can be found on the pillar on the south side of the Bridge of Eldin. | ||
| Eldin Field Female Grasshopper | Hyrule Field - Eldin Field | It can be found in the northwest part of the field near the edge. | ||
| Eldin Field Male Grasshopper | Hyrule FIeld - Eldin Field | It can be found in the south eastern part of the field near the north entrance to Kakariko Village | ||
| Kakariko Gorge Female Pill Bug | Hyrule Field - Kakariko Gorge | It can be found on the northern side of the gorge near a group of trees and flowers | ||
| Kakariko Gorge Male Pill Bug | Hyrule Field - Kakariko Gorge | It can be found on the southern side of the gorge near the bridge. | ||
| Kakariko Graveyard Male Ant | Kakariko Graveyard | It can be found at the base of a tree near the crawlspace that leads to the Zora Tomb | ||
| Kakariko Village Female Ant | Kakariko Village | It can be found in the house with the collapsed roof that is opposite of the Kakariko Inn | ||
| Lake Hylia Bridge Female Mantis | Hyrule Field - Bridge of Hylia | South of the bridge, it can be found on a rock wall on the path leading to Faron Field | ||
| Lake Hylia Bridge Male Mantis | Hyrule Field - Bridge of Hylia | It can be found on one of the bridge pillars near the north entrance to the bridge | ||
| Lanayru Field Female Stag Beetle | Hyrule Field - Lanayru Field | It can be found hiding on a rock wall above the entrance to the ice block puzzle cave. | ||
| Lanayru Field Male Stag Beetle | Hyrule Field - Lanayru Field | It can be found on a tree that is to the west of the bridge. | ||
| Outside South Castle Town Female Ladybug | Hyrule Field - Outside South Castle Town | It can be found in the flower bed near the stairs among some small trees. | ||
| Outside South Castle Town Male Ladybug | Hyrule Field - Outside South Castle Town | It can be found near the pillar with the climbable vines. | ||
| Upper Zoras River Female Dragonfly | Upper Zoras River | It can be found floating in front of Iza's Shop | ||
| West Hyrule Field Female Butterfly | Hyrule Field - Outside West Castle Town | It can be found on a vine-covered ledge among a group of flowers | ||
| West Hyrule Field Male Butterfly | Hyrule Field - Outside West Castle Town | It can be found among a group of flowers on the path leading to the ampitheater. | ||
| Zoras Domain Male Dragonfly | Zoras Domain | It can be found in the grass on the path above the Mother and Child Isles | ||
| Gerudo Desert Female Dayfly | Gerudo Desert | Near the entrance to the Cave of Ordeals, it can be found in one of the cervices to the east | ||
| Gerudo Desert Male Dayfly | Gerudo Desert | It can be found in the open of the south central area of the desert |
Poes
| Check Name | Location | Check Description | Requirements | Image |
|---|---|---|---|---|
| Faron Mist Poe | Faron Mist Area | On the stump in the middle of the Mist. Midna Jump to it. | ||
| Lost Woods Waterfall Poe | Lost Woods | On a ledge on an alcove behind a waterfall you can swim into. Can only be gotten during/after Grove 2. | ||
| Sacred Grove Temple of Time Owl Statue Poe | Sacred Grove - Past | Use the dominion rod to move the Owl Statue to release the poe. | ||
| Lost Woods Boulder Poe | Lost Woods | In the area where you first fight Skull Kid as a wolf, destroy the rock to release the poe. | ||
| Sacred Grove Master Sword Poe | Sacred Grove - Master Sword Area | In the area where the Master Sword pedestal is. Can only be gotten after Grove 2. | ||
| Faron Field Poe | Hyrule Field - Faron Field | Under a tree in the central field area. | ||
| Kakariko Gorge Poe | Eldin Lantern Cave | Under a tree on the hill overlooking the bridge. | ||
| Eldin Lantern Cave Poe | Eldin Lantern Cave | At one of the dead ends in the cave. | ||
| Kakariko Graveyard Open Poe | Kakariko Graveyard | Can be found in the graveyard normally. | ||
| Kakariko Graveyard Grave Poe | Kakariko Graveyard | Open one of graves to free the poe. | ||
| Kakariko Village Bomb Shop Poe | Kakariko Village | In the wreckage of the blown up Bomb Shop. | ||
| Kakariko Village Watchtower Poe | Kakariko Village | At the very top of the village, the poe can be found at the base of the watchtower. | ||
| Death Mountain Trail Poe | Death Mountain | On the ledge leading up the mountain. Use the Goron to get launched up to it. | ||
| Hidden Village Poe | Hidden Village | On a ledge near the entrance of the village. Defeat the Bublins and show Ilia the charm to get the poe to spawn. | ||
| Upper Zoras River Poe | Upper Zoras River | Where the river forks is a chunk of land in between it. Swim over there at night to find a Poe. | ||
| Zoras Domain Mother and Child Isle Poe | Zoras Domain | Above the Mother and Child Isle, there is a poe | ||
| Zoras Domain Waterfall Poe | Zoras Domain | To get this poe you can either Midna Jump as wolf near the Snowpeak entrance, or you can ledge drop from the top near Zora's Domain. | ||
| Snowpeak Blizzard Poe | Snowpeak | In the blizzard up to Snowpeak, the poe is near a rock. | ||
| Snowpeak Above Freezard Grotto Poe | Snowpeak | Near a lone tree on a ledge, there is a poe. | ||
| Snowpeak Poe Among Trees | Snowpeak | On the way up the mountain, there is an open area with some trees, the poe is under one of the trees. | ||
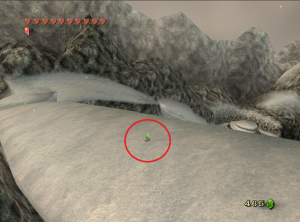
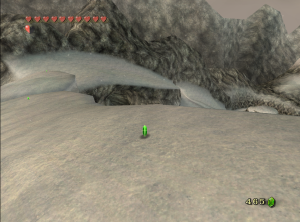
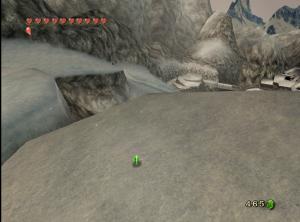
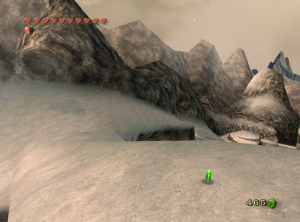
| Snowpeak Icy Summit Poe | Snowpeak | Near Snowpeak Ruins, there is a poe on the snowy mesa. | ||
| Snowpeak Cave Ice Poe | Snowpeak | In the cave on the way to the mountain top, use the Ball and Chain to destroy the ice and free the poe. | ||
| Lanayru Field Bridge Poe | Hyrule Field - Lanayru Field | On the bridge in the center of the field. | ||
| Lanayru Field Poe Grotto Left Poe | Hyrule Field - Lanayru Field | There is a circle of grass on the west side of the field. The poe is in that grotto. | ||
| Lanayru Field Poe Grotto Right Poe | Hyrule Field - Lanayru Field | There is a circle of grass on the west side of the field. The poe is in that grotto. | ||
| Outside South Castle Town Poe | Hyrule Field - Outside South Castle Town | At the top of the stairs near the fountain south of Castle Town. | ||
| East Castle Town Bridge Poe | Hyrule Field - Outside East Castle Town | There is a small area to the East of Castle Town and Eldin Main field. The poe can be found on the bridge. | ||
| Jovani House Poe | Castle Town | There is a dig patch outside of Jovani's house, dig there to find the poe inside. | ||
| Hyrule Field Ampitheater Poe | Hyrule Field - Outside West Castle Town | On the south side of West Hyrule Field in the ampitheater area overlooking the Bridge of Hylia. | ||
| Flight By Fowl Ledge Poe | Lake Hylia | Below the Flight-By-Fowl house, there is a ledge that has a poe on it. Use a Cucco to fly to it. | ||
| Isle of Riches Poe | Lake Hylia | On the second platform of the Isle of Riches | ||
| Lake Hylia Dock Poe | Lake Hylia | At the bottom of the waterfall, there is a poe on the strip of land. | ||
| Lake Hylia Tower Poe | Lake Hylia | At the base of the tower where you meet Auru. | ||
| Lake Hylia Alcove Poe | Lake Hylia | Near where the warp portal spawns you, there is an alcove to the south where the poe is hiding. | ||
| Lake Lantern Cave First Poe | Lake Hylia | Near the beginning of the cave. | ||
| Lake Lantern Cave Second Poe | Lake Hylia | Towards the middle of the cave. | ||
| Lake Lantern Cave Final Poe | Lake Hylia | At the very end of the cave | ||
| Lake Hylia Bridge Cliff Poe | Hyrule Field - Lake Hylia Bridge | South of the Bridge of Hylia, use Bomb Arrows to reveal the Clawshot targets and make your way up to the poe. | ||
| Gerudo Desert East Poe | Gerudo Desert | South of where you land when getting launched into the Desert, there is a poe sitting above a grotto. | ||
| Gerudo Desert North Peahat Poe | Gerudo Desert | East of the Bublin Camp you can see the poe on a ledge. Use the Clawshot to latch onto the Peahat to get up to it. | ||
| Gerudo Desert Rock Grotto First Poe | Gerudo Desert | In the boulder-filled grotto that is below the poe east of the Bublin Camp. | ||
| Gerudo Desert Rock Grotto Second Poe | Gerudo Desert | In the boulder-filled grotto that is below the poe east of the Bublin Camp. | ||
| Outside Bulblin Camp Poe | Gerudo Desert | Just before entering the Bulblin fortress, off to the side of where you met the Golden Wolf is a Poe at night. | ||
| Bulblin Camp Poe | Bulblin Camp | Return to the burned down remains of the building where you fought King Bulblin at night. | ||
| Outside Arbiters Grounds Poe | Bulblin Campe | Outside the entrance to Arbiter's Grounds | ||
| Arbiters Grounds Torch Room Poe | Arbiters Grounds | In the room with the four torches. | ||
| Arbiters Grounds East Turning Room Poe | Arbiters Grounds | After getting the Poe Scent, pull the chain to access the downstairs and turn the lever, then use the Clawshot to access the upper floor to reach the room with the poe. | ||
| Arbiters Grounds Hidden Wall Poe | Arbiters Grounds | In the hallway with the stalchildren and the ReDeads, pull the chain buried in the sand to reveal the poe. | ||
| Arbiters Grounds West Poe | Arbiters Grounds | At the very end of the west wing. | ||
| Snowpeak Ruins Lobby Poe | Snowpeak Ruins | In the middle of the lobby above the icy floor. | ||
| Snowpeak Ruins Lobby Armor Poe | Snowpeak Ruins | Destroy one of the suits of armor with the Ball and Chain to free the poe. | ||
| Snowpeak Ruins Ice Room Poe | Snowpeak Ruins | In the room with the icy floor and all the Mini Freezards on the second floor. | ||
| Temple of Time Poe Behind Gate | Temple of Time | In the room with the central turning platform, use the Dominion Rod to move a statue onto a switch to open the gate. | ||
| Temple of Time Poe Above Scales | Temple of Time | Near the door to the Big Key room. The poe can be found on the ledge. | ||
| City in The Sky Garden Island Poe | City in The Sky | In the room after the Big Baba, Clawshot to the little island off to the left. | ||
| City in The Sky Poe Above Central Fan | City in The Sky | In the area just outside the fan room where you get the Big Key, tight rope across all the platforms, working your way to the west where you'll find a Poe. | ||
| Gerudo Desert Poe Above Cave of Ordeals | Gerudo Desert | Near the warp portal for the Desert | ||
| Cave of Ordeals Floor 17 Poe | Cave of Ordeals | In room with stallhounds | ||
| Cave of Ordeals Floor 33 Poe | Cave of Ordeals | In room with some Redead Knights | ||
| Cave of Ordeals Floor 44 Poe | Cave of Ordeals | In room with 4 Dinalfos |
Skybook Characters
| Check Name | Location | Check Description | Requirements | Image |
|---|---|---|---|---|
| Faron Woods Owl Statue Sky Character | South Faron Woods | In Faron Woods, north of Coro's Hut, use the Powered Dominion Rod to move the Owl Statue. | ||
| Kakariko Gorge Owl Statue Sky Character | Hyrule Field - Kakariko Gorge | In the northern area of Kakariko Gorge, use the Powered Dominion Rod to move the Owl Statue. | ||
| Bridge of Eldin Owl Statue Sky Character | Hyrule Field - Eldin Field | On the North Side of the Bridge of Eldin, use the Powered Dominion Rod to move the Owl Statue. | ||
| Hyrule Field Ampitheater Owl Statue Sky Character | Hyrule Field - Outside West Castle Town | In West Hyrule Field in the ampitheater area overlooking the Hylia Bridge, use the Powered Dominion Rod to move the Owl Statue. | ||
| Lake Hylia Bridge Owl Statue Sky Character | Hyrule Field - Bridge of Hylia | South of the Bridge of Hylia, use the Powered Dominion Rod to move the Owl Statue, then use the Clawshot on the vines to land on the Owl Statue to reach the chest. | ||
| Gerudo Desert Owl Statue Sky Character | Gerudo Desert | In the South-Central area of the Desert, use the Powered Dominion Rod to move the Owl Statue. |
Shop Items
| Check Name | Location | Check Description | Requirements | Image |
|---|---|---|---|---|
| Sera Shop Slingshot | Ordon Village | The item is available to be bought in Sera's shop after rescuing the cat during the prologue, or by having it skipped. | Needs | |
| Kakariko Village Malo Mart Hawkeye | Kakariko Village | After completing Goron Mines, talk to Talo who is on top of the watchtower in Kakariko Village to start the archery minigame. Starting the game allows the item to be bought from the shop. (Note: You do not need to complete the minigame. Starting it is enough to put the item in the shop.) | Needs
|
|
| Kakariko Village Malo Mart Hylian Shield | Kakariko Village | After completing Eldin Twilight, you can purchase the item from the shop for 200 rupees. | Needs
|
|
| Kakariko Village Malo Mart Red Potion | Kakariko Village | After completing Eldin Twilight, you can purchase the item from the shop after purchasing the Hylian Shield check. | Needs
|
|
| Kakariko Village Malo Mart Wooden Shield | Kakariko Village | After completing Eldin Twilight, you can purchase the item from the shop. | Needs
|
|
| Castle Town Malo Mart Magic Armor | Castle Town | Once you have completed the quest line to open the Castle Town branch of Malo Mart, you can buy the item for 598 Rupees. | Needs
|
|
| Castle Town Goron Shop Red Potion | Castle Town | Talk to the young Goron on the lower level to buy the item. | Nothing | |
| Castle Town Goron Shop Lantern Oil | Castle Town | Talk to the young Goron on the upper level to buy the item. | Nothing | |
| Castle Town Goron Shop Hylian Shield | Castle Town | Talk to the Adult Goron on the lower level to buy the item. | Nothing | |
| Castle Town Goron Shop Arrow Refill | Castle Town | Talk to the Adult Goron on the upper level to buy the item. | Nothing |
Hidden Skills
| Check Name | Location | Check Description | Requirements | Image |
|---|---|---|---|---|
| Ordon Spring Golden Wolf | Ordon Spring | After howling at the Death Mountain stone, the Golden Wolf can be found near the crawlspace in the spring. | Needs | |
| Faron Woods Golden Wolf | North Faron Woods | The Golden Wolf can be found opposite of Trill's shop after completing Faron Twilight. | Needs | |
| Kakariko Graveyard Golden Wolf | Kakariko Graveyard | After howling at the Snowpeak stone, the Golden Wolf can be found in front of the stone that leads to the Zora Tomb in the graveyard. | Needs
Optional
|
|
| North Castle Town Golden Wolf | Castle Town | After howling at the Hidden Village stone, the Golden Wolf can be found in front of the entrance to Hyrule Castle. | Needs | |
| Outside South Castle Town Golden Wolf | Hyrule Field - Outside South Castle Town | After howling at the North Faron Woods stone, the Golden Wolf can be found beside the stairs leading south of Castle Town near the chasm that leads to Lake Hylia. | Needs | |
| West Hyrule Field Golden Wolf | Hyrule Field - Outside West Castle Town | After howling at the Upper Zora's River stone, the Golden Wolf can be found on a ledge near the west entrance to Castle Town. | Needs | |
| Gerudo Desert Golden Wolf | Gerudo Desert | After howling at the Lake Hylia stone, the Golden Wolf can be found on the path to the Bulblin Camp. | Needs |
Freestanding Rupees
| Check Name | Location | Check Description | Requirements | Image |
|---|---|---|---|---|
| Ordon Bo Cliff Rupee | Ordon Village | On the cliff above Mayor Bo's House. Use the hawk grass on top of Bo's House to catch a chicken, then use the chicken to fly to the cliff. | None | |
| Ordon Bo Window Rupee 1 | Ordon Village | In front of the window on Mayor Bo's House. Climb the ladder behind Bo's house to reach the rupee. | None | |
| Ordon Bo Window Rupee 2 | Ordon Village | In front of the window on Mayor Bo's House. Climb the ladder behind Bo's house to reach the rupee. | None | |
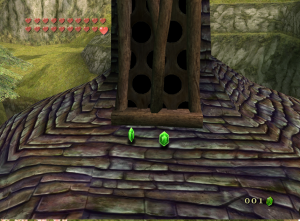
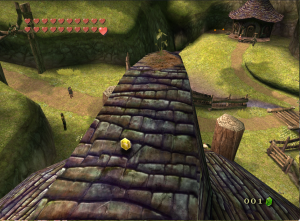
| Ordon Bo Roof Rupee | Ordon Village | On the roof near the hawk grass on Mayor Bo's House. Climb the ladder behind Bo's house to reach the rupee. | None | |
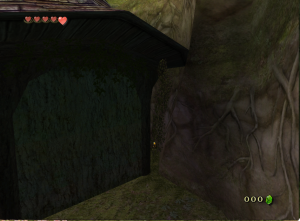
| Ordon Hidden Rusl House Rupee | Ordon Village | Hidden behind Rusl's House | Boomerang | |
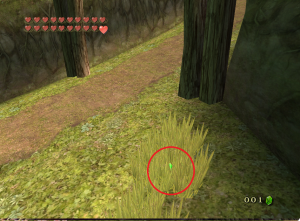
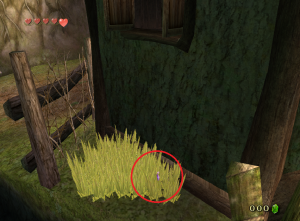
| Ordon Rupee In Grass By Bo | Ordon Village | In the grass near the Ordon Ranch entrance. | None | |
| Ordon Rupee In River 1 | Ordon Village | In the river next to Rusl's House. | None | |
| Ordon Rupee In River 2 | Ordon Village | In the river next to Rusl's House. | None | |
| Ordon Rupee Under Bridge | Ordon Village | In the river under the bridge in the middle of the village | None | |
| Ordon Rupee Under Tall Tree 1 | Ordon Village | At the base of the tall tree. | None | |
| Ordon Rupee Under Tall Tree 2 | Ordon Village | At the base of the tall tree. | None | |
| Ordon Rusl House Roof Rupee 1 | Ordon Village | On the roof of Rusl's House. Jump from Rusl's porch onto the house sign and then onto the roof. | None | |
| Ordon Rusl House Roof Rupee 2 | Ordon Village | On the roof of Rusl's House. Jump from Rusl's porch onto the house sign and then onto the roof. | None | |
| Ordon Shield House Ledge Grass Rupee | Ordon Village | In the grass on the ledge next to the shield house. | Clawshot or Boomerang
|
|
| Ordon Tree Long Branch Rupee | Ordon Village | At the end of the long branch of the tall tree | None | |
| Ordon Tree Short Branch Rupee | Ordon Village | At the end of the short branch of the tall tree | None | |
| Death Mountain Volcano Ledge Rupee 1 | Death Mountain | At the top of the mountain, use a Goron to launch yourself up to the ledge. |
|
|
| Death Mountain Volcano Ledge Rupee 2 | Death Mountain | At the top of the mountain, use a Goron to launch yourself up to the ledge. |
|
|
| Death Mountain Volcano Ledge Rupee 3 | Death Mountain | At the top of the mountain, use a Goron to launch yourself up to the ledge. |
|
|
| Zoras Domain Behind Waterfall Rupee | Zoras Domain | On a ledge behind the waterfall. You can use a Zora to go up the waterfall and drop down from the top. | Clear Lanyaru Twilight | |
| Zoras Domain Top Ledge Rupee | Zoras Domain | On the top ledge of the waterfall. You can use a Zora to go up the waterfall and drop down from the top. | Clear Lanyaru Twilight | |
| Zoras Domain Vine Ledge Rupee | Zoras Domain | On the vine ledge leading to the HF shortcut. You can use a Zora to go up the waterfall and drop down from the top. | Clear Lanyaru Twilight | |
| Zoras Domain Waterfall Ledge Rupee | Zoras Domain | On the ledge next to the waterfall. You can use a Zora to go up the waterfall and drop down from the top. | Clear Lanyaru Twilight | |
| Zoras Domain Shortcut Ledge Rupee | Zoras Domain | On the ledge leading to the HF shortcut. You can use a Zora to go up the waterfall and drop down from the top. | Clear Lanyaru Twilight | |
| Zoras Domain Throne East Gate Underwater Rupee | Zoras Domain | Behind the underwater gate leading to Zoras Domain | Clear Lanyaru Twilight and Iron Boots | |
| Zoras Domain Throne West Gate Underwater Rupee | Zoras Domain | Behind the underwater gate leading to Zoras Domain | Clear Lanyaru Twilight and Iron Boots | |
| Zoras Domain Throne East Underwater Rupee | Zoras Domain | On a ledge in the underwater area with the lava rock | Clear Lanyaru Twilight and Iron Boots | |
| Zoras Domain Throne West Underwater Rupee | Zoras Domain | On a ledge in the underwater area with the lava rock | Clear Lanyaru Twilight and Iron Boots | |
| Zoras Domain Throne Northwest Underwater Rupee | Zoras Domain | On a ledge in the underwater area with the lava rock | Clear Lanyaru Twilight and Iron Boots | |
| Zoras Domain Throne South Underwater Rupee | Zoras Domain | On a ledge in the underwater area with the lava rock | Clear Lanyaru Twilight and Iron Boots | |
| Lake Hylia Left Underwater Pillar Rupee | Lake Hylia | On an underwater pillar near the Lakebed Temple Entrance | Clear Lanyaru Twilight and Zora Armor | |
| Lake Hylia Right Underwater Pillar Rupee | Lake Hylia | On an underwater pillar near the Lakebed Temple Entrance | Clear Lanyaru Twilight and Zora Armor | |
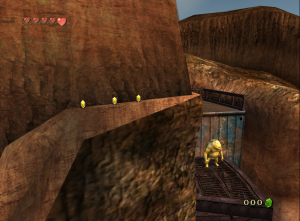
| Snowboarding Top Left Rupee | Snowpeak Mountain | While Snowboarding down the mountain, leap onto the left ledge near the start of the path. |
|
|
| Snowboarding Top Right Rupee | Snowpeak Mountain | While Snowboarding down the mountain, leap onto the right ledge near the start of the path. |
|
|
| Snowboarding Bridge Ledge Upper Rupee | Snowpeak Mountain | While Snowboarding down the mountain, leap onto the right ledge above the bridge. |
|
|
| Snowboarding Bridge Ledge Middle Rupee | Snowpeak Mountain | While Snowboarding down the mountain, leap onto the right ledge above the bridge. |
|
|
| Snowboarding Bridge Ledge Lower Rupee | Snowpeak Mountain | While Snowboarding down the mountain, leap onto the right ledge above the bridge. |
|
|
| Snowboarding Snowy Tree Top Rupee 1 | Snowpeak Mountain | While Snowboarding down the mountain, leap onto the tree tops that have snow ledges on them. |
|
|
| Snowboarding Snowy Tree Top Rupee 2 | Snowpeak Mountain | While Snowboarding down the mountain, leap onto the tree tops that have snow ledges on them. |
|
|
| Snowboarding Snowy Tree Top Rupee 3 | Snowpeak Mountain | While Snowboarding down the mountain, leap onto the tree tops that have snow ledges on them. |
|
|
| Snowboarding Shortcut Rupee 1 | Snowpeak Mountain | While Snowboarding down the mountain, take the shortcut to the left to reach the rupee. |
|
|
| Snowboarding Shortcut Rupee 2 | Snowpeak Mountain | While Snowboarding down the mountain, take the shortcut to the left to reach the rupee. |
|
|
| Snowboarding Shortcut Rupee 3 | Snowpeak Mountain | While Snowboarding down the mountain, take the shortcut to the left to reach the rupee. |
|
|
| Snowboarding Shortcut Rupee 4 | Snowpeak Mountain | While Snowboarding down the mountain, take the shortcut to the left to reach the rupee. |
|
|
| Snowboarding Shortcut Rupee 5 | Snowpeak Mountain | While Snowboarding down the mountain, take the shortcut to the left to reach the rupee. |
|
|
| Snowboarding Shortcut Rupee 6 | Snowpeak Mountain | While Snowboarding down the mountain, take the shortcut to the left to reach the rupee. |
|
|
| Snowboarding Shortcut Rupee 7 | Snowpeak Mountain | While Snowboarding down the mountain, take the shortcut to the left to reach the rupee. |
|
|
| Snowboarding Shortcut Rupee 8 | Snowpeak Mountain | While Snowboarding down the mountain, take the shortcut to the left to reach the rupee. | None | |
| Snowboarding Shortcut Rupee 9 | Snowpeak Mountain | While Snowboarding down the mountain, take the shortcut to the left to reach the rupee. |
|
|
| Snowboarding Shortcut Rupee 10 | Snowpeak Mountain | While Snowboarding down the mountain, take the shortcut to the left to reach the rupee. |
|
|
| Snowboarding Shortcut Rupee 11 | Snowpeak Mountain | While Snowboarding down the mountain, take the shortcut to the left to reach the rupee. |
|
Hidden Rupees
| Check Name | Location | Check Description | Requirements | Image |
|---|---|---|---|---|
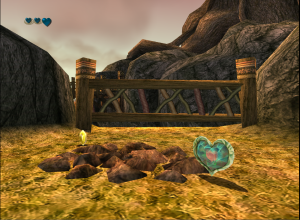
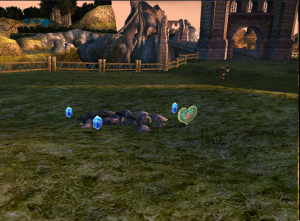
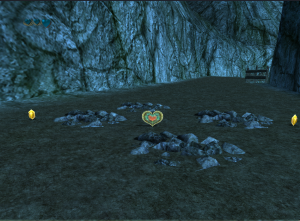
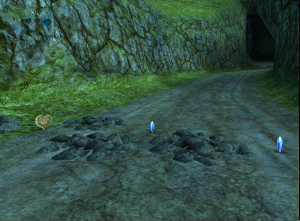
| Faron Woods Coro Boulder Rupee 1 | Faron Woods | Under the boulder blocking the path to the Owl Statue | Bomb Bag or Ball and Chain | |
| Faron Woods Coro Boulder Rupee 2 | Faron Woods | Under the boulder blocking the path to the Owl Statue | Bomb Bag or Ball and Chain | |
| Faron Woods Coro Boulder Rupee 3 | Faron Woods | Under the boulder blocking the path to the Owl Statue | Bomb Bag or Ball and Chain | |
| Faron Woods Coro Boulder Rupee 4 | Faron Woods | Under the boulder blocking the path to the Owl Statue | Bomb Bag or Ball and Chain | |
| Kakariko Village Bell Rupee | Kakariko Village | Above the sanctuary hidden in the bell. Use Bomb Arrows/Boomerang and Bombs on the bell to make the rupee appear. |
|
|
| Eldin Spring Underwater Boulder Rupee | Kakariko Village | Under the underwater boulder in the back of the Eldin Spring |
|
|
| Kakariko Graveyard Underwater Boulder Rupee | Kakariko Graveyard | Under the underwater boulder in the Zora grave area. |
|
|
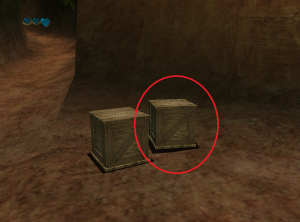
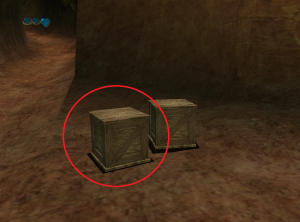
| Kakariko Village Spring Shortcut Box Rupee 1 | Kakariko Village | In a box behind the boulder leading to the back of the Eldin Spring |
|
|
| Kakariko Village Spring Shortcut Box Rupee 2 | Kakariko Village | In a box behind the boulder leading to the back of the Eldin Spring |
|
|
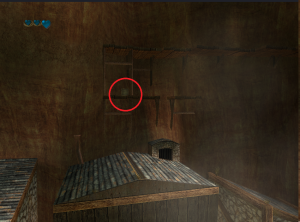
| Kakariko Village Ant House Ledge Box Rupee | Kakariko Village | In a box on a ledge above the ant house. |
|
|
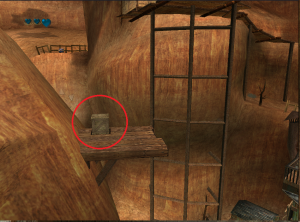
| Kakariko Village Hot Spring Ledge Box Rupee | Kakariko Village | In a box on a ledge next to the hot spring |
|
|
| Death Mountain Volcano Pipe Ledge Rock Rupee | Kakariko Village | Under the lowest pipe is a ledge with a rock on it. Use a Goron to get on the ledge to get the check. |
|
|
| Lanayru Spring Lower Underwater Boulder Rupee | Lanayru Spring | Under the lower underwater boulder in the spring |
|
|
| Lanayru Spring Upper Underwater Boulder Rupee | Lanayru Spring | Under the upper underwater boulder in the spring |
|
|
| Lake Hylia Right Underwater Boulder Rupee | Lake Hylia | Under a boulder in the area near the Lakebed Temple Entrance |
|
|
| Lake Hylia Left Underwater Boulder Rupee | Lake Hylia | Under a boulder in the area near the Lakebed Temple Entrance |
|
|
| Bridge of Eldin Boulder Rupee | Hyrule Field | Under a boulder on the north side of the bridge. |
|
|
| Kakariko Gorge Owl Statue Boulder Rupee | Hyrule Field | Under a boulder near the Owl Statue. |
|
|
| Kakariko Gorge Spire Boulder Rupee | Hyrule Field | Under a boulder near the rock spire. |
|
|
| Lake Hylia Bridge Faron Boulder Rupee | Hyrule Field | Under a boulder on the south side of the bridge near the Faron transition. |
|
|
| Lake Hylia Bridge Owl Statue Boulder Rupee | Hyrule Field | Under a boulder near the Owl Statue. |
|
|
| Lanayru Field North Spinner Track Boulder Rupee | Hyrule Field | Under a boulder on the north side of the Spinner tracks |
|
|
| Lanayru Field South Spinner Track Boulder Rupee | Hyrule Field | Under a boulder on the south side of the Spinner tracks |
|
|
| Lanayru Field North Underwater Boulder Rupee | Hyrule Field | Under the northern underwater boulder in Lanayru Field |
|
|
| Lanayru Field South Underwater Boulder Rupee | Hyrule Field | Under the southern underwater boulder in Lanayru Field |
|
|
| Lanayru Field Tree Boulder Rupee | Hyrule Field | Under a boulder near a group of trees next to the Spinner track shortcut. |
|
|
| West Hyrule Field Northern Boulder Rupee | Hyrule Field | Under a boulder near the castle walls |
|
|
| West Hyrule Field Southern Boulder Rupee | Hyrule Field | Under a boulder near the castle walls |
|
|
| Outside South Castle Town Boulder Rupee | Hyrule Field | Under a boulder near the castle walls |
|
|
| Zoras Domain Shortcut Lower Boulder Rupee | Zoras Domain | Under the lower boulder blocking the path to the HF shortcut. |
|
|
| Zoras Domain Shortcut Upper Boulder Rupee | Zoras Domain | Under the lower boulder blocking the path to the HF shortcut. |
|
|
| Zoras Domain South Underwater Boulder Rupee | Zoras Domain | Under the southern boulder in the main underwater area. |
|
|
| Zoras Domain North Underwater Boulder Rupee | Zoras Domain | Under the southern boulder in the main underwater area. |
|
|
| Upper Zoras River East Underwater Boulder Rupee | Upper Zoras River | Under the underwater boulder near the wooden gate |
|
|
| Upper Zoras River Central Underwater Boulder Rupee | Upper Zoras River | Under the underwater boulder near Iza |
|
|
| Upper Zoras River West Underwater Boulder Rupee | Upper Zoras River | Under the underwater boulder near the HF shortcut |
|
|
| Upper Zoras River Ledge Boulder Rupee | Upper Zoras River | Under the boulder next to the Howling Stone |
|
